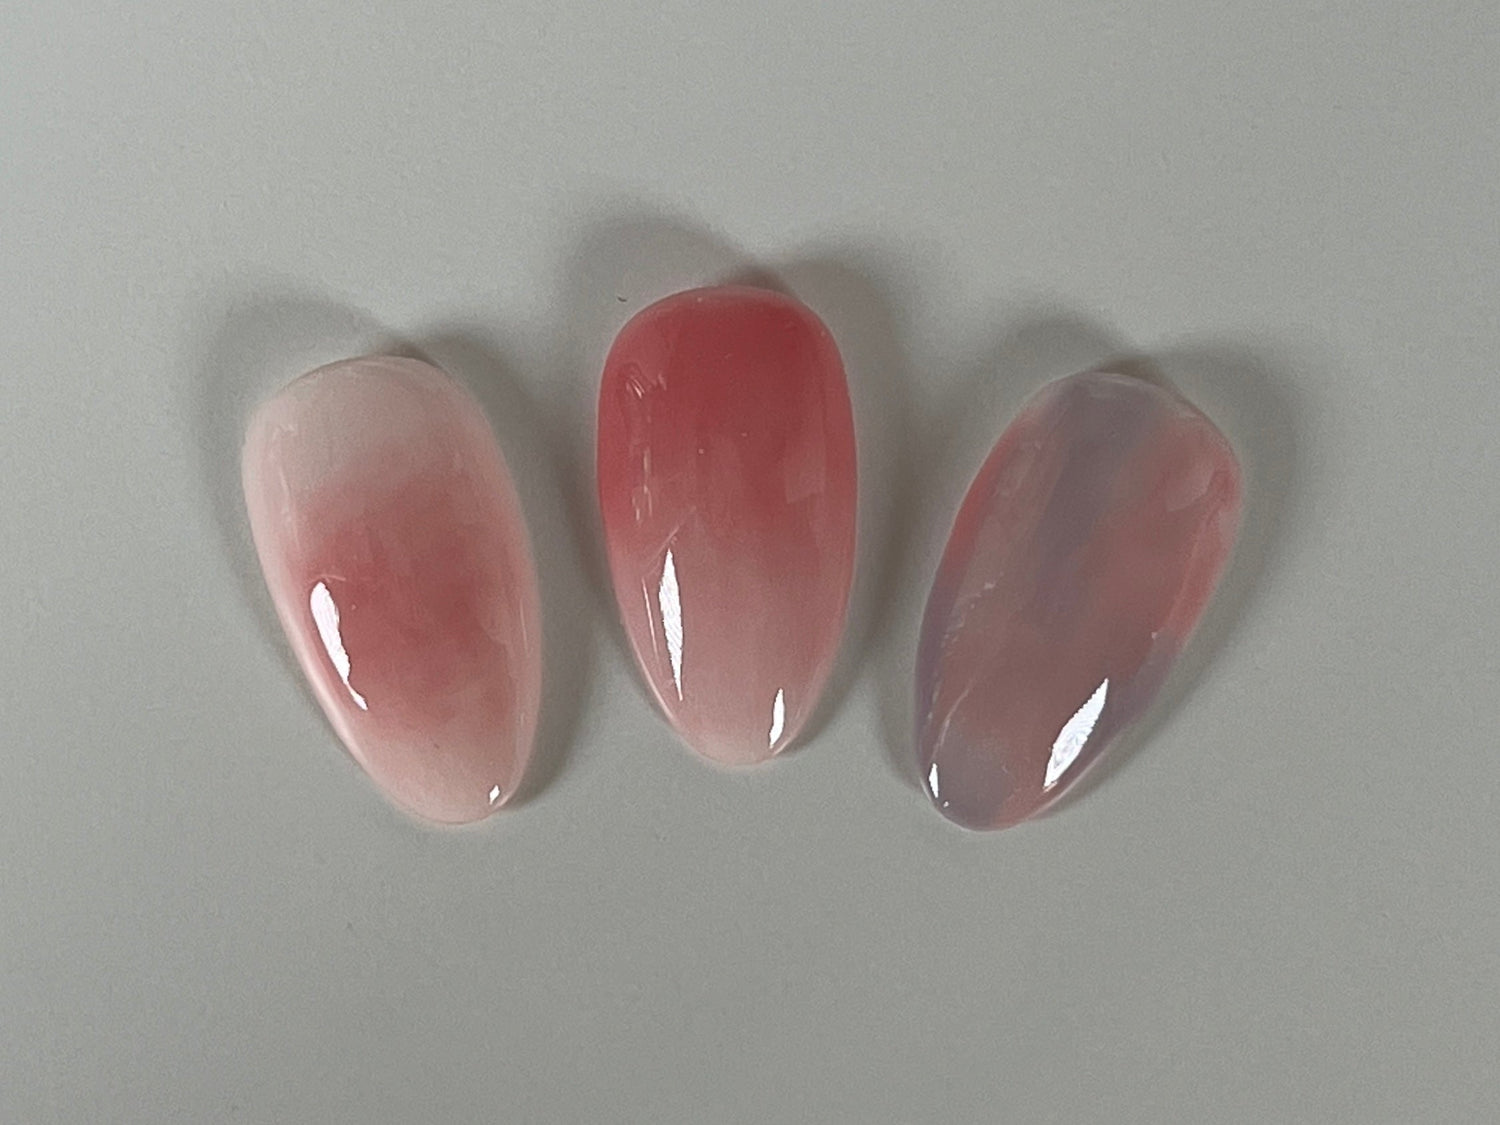
 Soft. Clean. Glossy. Three words that describe the appearance of jelly nails, milk bath nails, or lip gloss nails. Whatever we decide to call it to renew its trendiness, this translucent manicure is best achieved through what the Korean nail industry standardly refers to as “syrup gels.” Sheer yet buildable, syrup gels are not only perfect for an understated manicure, but they also contain the ideal opacity and consistency to create seamless ombre or gradation effects in nail design.
Although there are a few other techniques that can be used to create gradients, such as using pigment powders, an airbrush, or the sponge method, mastering the art of gradation using syrup gels can help in establishing a more efficient process without having to pull out extra tools or supplies. Syrup gel gradation techniques also result in a more organic appearance as the colors blend together more softly compared to other methods.
Below are three syrup gel techniques to achieve different gradation effects using syrup gels.
Circular Gradation (Blush Nails) |
|
Using 2 syrup gel colors |
- Prep the nails and apply a base coat.
- Select your syrup gel base color. Lighter colors such as a milky white or light pastel pink tend to work best as a base. Apply one layer to the nail. Fully cure layer in a UV/LED lamp according to manufacturer’s instructions.

- Select your second syrup gel color. Brighter and vibrant colors such as a rosy pink typically work best as a center gradient color. Apply a dollop of the secondary syrup gel color on the center of the nail. Use a slightly frayed liner brush or an ombre brush to spread and thin out the gel at the edge of the dollop, blending the color into the base color and leaving the center more concentrated in color. Fully cure in a UV/LED lamp.


- Apply another smaller dollop of the second syrup gel color in the center of the first dollop. Use the brush to light spread the gel at the edges and make the gradation more even. Fully cure.

- Apply a thin layer of the first syrup gel color over the circular gradation. This layer softens the transition from the center color to the base color, helping to create a more seamless gradation effect. Fully cure layer.

- Apply a coat of top gel and cure.
Horizontal Gradation Nails |
|
Using 2 syrup gel colors |
- Prep the nails and apply a base coat.
- Apply one layer of your selected syrup gel base color. This color should be a lighter color than your secondary color. Fully cure in a UV/LED lamp according to manufacturer’s instructions..
- Using the same color, wipe the brush against the edge of the bottle so that there is a small amount of gel on only one side of the brush. Apply the color onto the nail, starting at the free edge and pull the color towards the center of the nail. Do not cure.
- Take your second syrup gel color and apply the gel to the nail starting at the base of the nail. Pull the color towards the center of the nail, blending the color into the first color, creating a gradation effect. Lighten your pressure as you pull the color down to blend the second color into the first color. Fully cure.

- Take a smaller amount of the second color on your brush and apply it at the base of the nail. Swipe away excess gel from your brush and pull the color down about one-fourth of the nail. Again, lighten your pressure as you brush the color down to blend it into the first color. Fully cure.
- Apply a thin layer of the first syrup gel color over the whole nail to soften the gradient. Fully cure layer.
- Apply a top gel and cure.

Alternative Gradation Nails |
|
Using 3 syrup gel colors |
- Prep the nails and apply a base coat.
- Apply one layer of your selected syrup gel base color.
- Select your second syrup gel color. Wipe the brush of your second syrup color against the edge of the bottle, leaving only a thin amount of gel on one side of the brush. Apply small patches of the second color onto desired areas of the nail. Do not cure.

- Select your third syrup gel color. Clean off the brush of the third syrup gel color using the same technique as described in step 3, leaving only a thin amount of gel on one side of the brush. Apply the third color in patches in areas without the second color. Do not cure.

- Clean off the brush of the third syrup gel color and with very light pressure, float the brush above the uncured gel, gently swiping downward to blend the colors into each other for a gradation effect, without completely mixing the colors together. Fully cure in a UV/LED lamp according to product manufacturer’s instructions.

- Apply a thin layer of the first syrup gel color to create a more blended look. Fully cure layer.
- Apply top gel and cure.

With practice, using syrup gels can be a fantastic and efficient way to create gradient nails with a more organic feel. The results are a seamless fusion of soft colors for beautiful nail design.

Leave a comment
All comments are moderated before being published.
This site is protected by hCaptcha and the hCaptcha Privacy Policy and Terms of Service apply.