
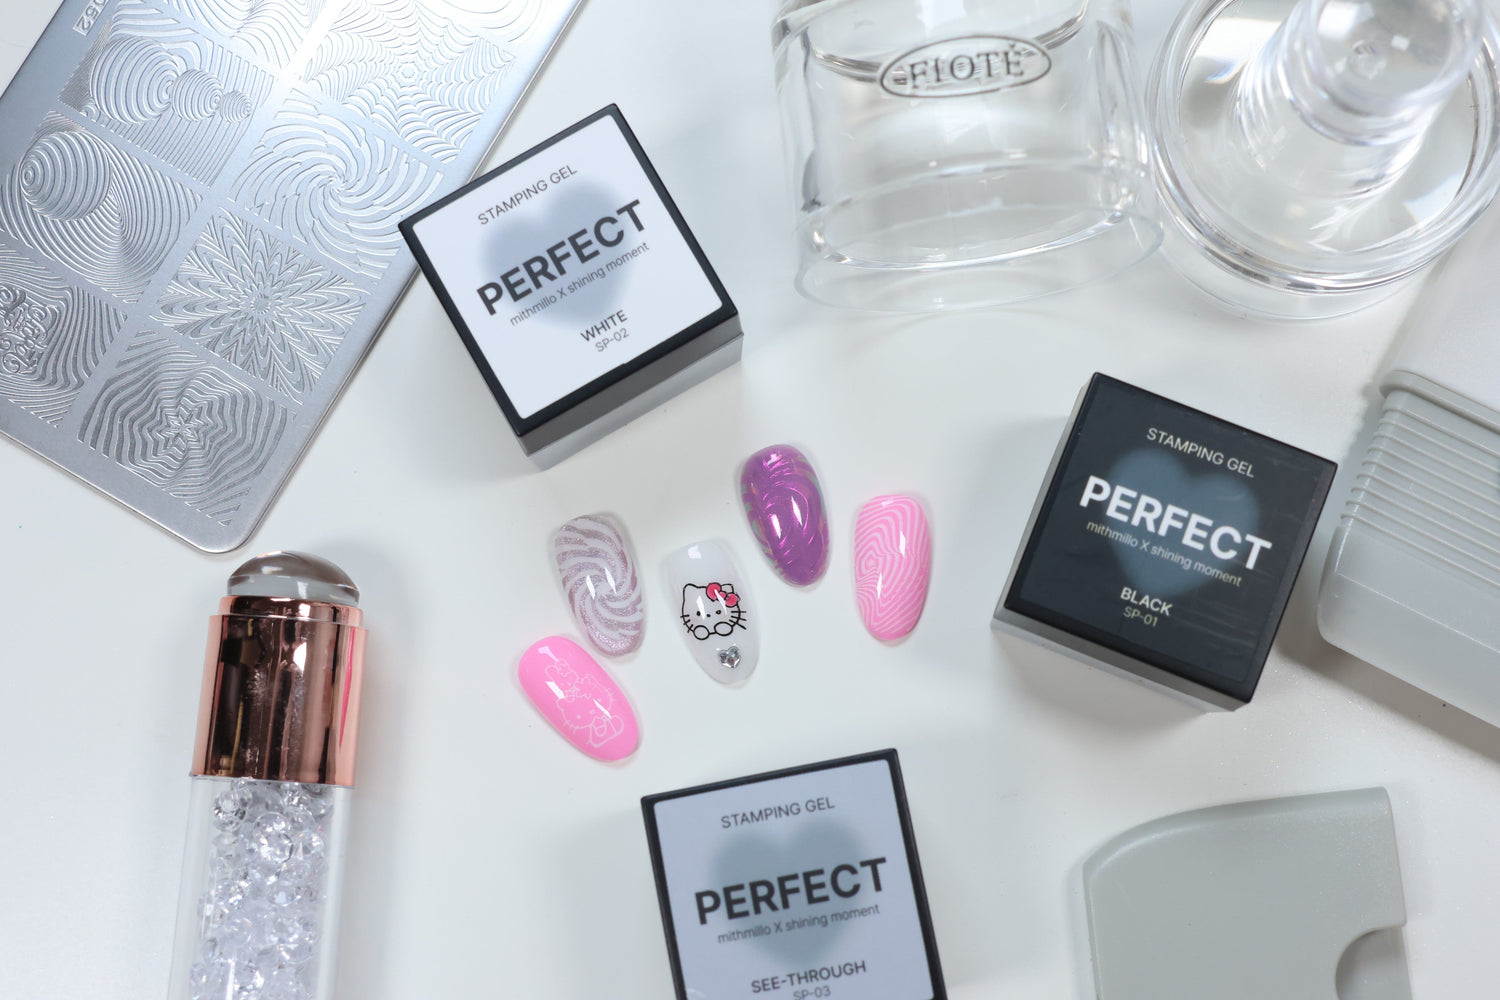

Nail stamping is a technique that can be used to quickly transfer detailed art onto the nails without having to hand-paint each individual detail. It can help nail artists achieve consistent, repeatable results, making it a useful technique for both beginners and professional nail artists.
The technique involves using a stamping plate with engraved designs, stamping gel, a scraper, and a silicone or rubber stamper to transfer the design onto the nails. There are endless stamping plate designs to choose, ranging from floral designs to geometric patterns, seasonal designs, and intricate line art. Stamping can also be used as a foundation for more creative nail art. Artists can layer different stamped designs, add hand-painted details, nail parts, or combine stamping with chrome powders, glitter, and other effects to create more complex looks.

There can be a learning curve to nail stamping, but with practice, it can become a time saving way to achieve intricate or fine detailed designs. Stamping can be especially beneficial when working with multiple clients or recreating a specific design across multiple nails. Instead of manually painting the same intricate pattern over and over, stamping allows you to reproduce the design quickly and consistently. It can also be a helpful technique for artists who may not feel confident hand-painting highly detailed designs or who want to expand the variety of nail art offered.
If you’re interested in this fast and easy way to achieve detailed, intricate nail art, keep reading as we share how to use stamping for nail design.
Supplies You’ll Need For Stamping
-
Flat edge silicone tool or metal spatula
-
Scraper
-
Detail brush and acetone for cleanup
When nail stamping, it’s ideal to use specifically formulated stamping gel to ensure the details are captured and transferred clearly onto the nails. Common gel polish can separate and settle, resulting in smeared or blurry designs. Stamping gel comes in various colors and is typically a highly pigmented, thick gel. It is specially designed with the appropriate consistency for crisp and detailed designs in nail stamping.
Basic Stamping
- Prep the nails. Apply a base coat. Cure.
-
Apply your choice of gel polish for the base color. Cure.

-
Remove the tacky inhibition layer with an alcohol wipe.

-
Select your desired stamping plate design, and apply a small amount of stamping gel onto the stamping plate design.

-
Use a flat-edge scraper to spread the gel across the design and remove excess gel. Hold the scraper at about a 45 degree angle and make one smooth, firm pass across the design.

-
Use the stamper to pick up the design from the stamping plate. Gently roll the stamper starting from one end to the other to pick up design. Avoid using too much pressure as this can cause the design to smear.

-
Using the same rolling motion, apply the design from the stamper onto the nail. Use a brush with acetone to clean any unwanted gel from the surrounding areas or from the skin. Cure.

- Apply top gel. Cure.
Nail stamping is a straightforward concept, but the steps can be quite technical. Although this general guideline covers the basis of nail stamping, it is highly recommended to practice nail stamping with your specific products to get a comfortable grasp on how much stamping gel to use, scraping, pressure to pick up and transfer a design cleanly. Through practice and mastery, nail stamping can be a useful nail art technique to quickly achieve intricate nail patterns.
Stamping Chrome Designs
Nail stamping doesn’t have to be limited to color. This technique can also be used to apply intricate chrome powder designs.
-
Prep the nails. Apply a base coat. Cure.
-
Apply your choice of gel polish for the base color. Cure.

-
Apply a powder-resistant matte top gel. Cure.

-
Select your desired stamping plate design, and use a flat end silicone tool or metal spatula to apply a small amount of chrome-friendly stamping gel onto the stamping plate design.
- Use a flat-edge scraper to spread the gel across the design and remove excess gel.

-
Use the stamper to pick up the design, slowly and firmly rolling from one end to the other. Be careful not to apply too much pressure as this can cause the design to smudge.
-
Using the same rolling motion, apply the design onto the nail. Clean any unwanted gel from the surrounding areas or skin with a brush and acetone. Cure for only 30 seconds or according to the stamping gel instructions for use with chrome powder.

-
Use a sponge applicator to apply your choice of chrome powder over the design.

-
Apply a layer of clear gel to protect the chrome design. Cure.
-
Apply top gel. Cure
Stamping can be done to quickly achieve detailed, intricate art on the nails and used for repeating designs on multiple nails or different nail sets for clients. For nail artists, it can be a valuable time-saving technique that helps improve consistency, expand design options, and make intricate art more efficient and accessible.
For more nail content including nail art how-to’s, swatches, and new releases, follow Sweetie Nail Supply on social media:

Leave a comment
All comments are moderated before being published.
This site is protected by hCaptcha and the hCaptcha Privacy Policy and Terms of Service apply.