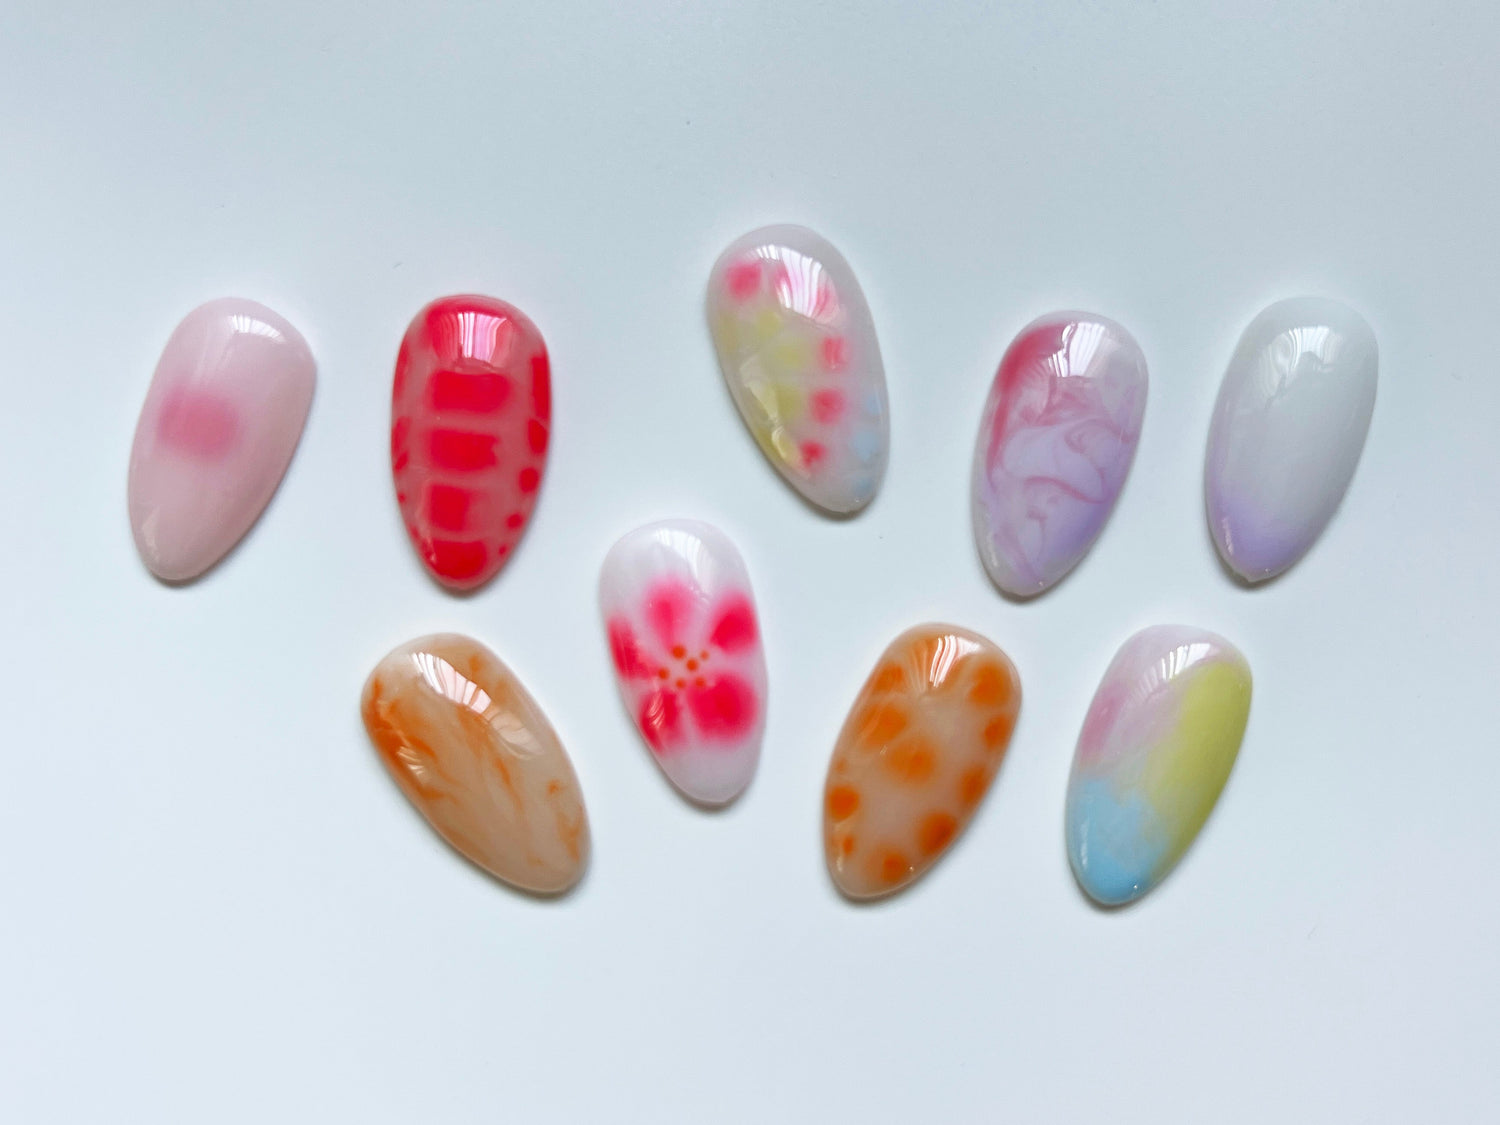
Create fun and easy nail art designs that are the vibes for summer yet adaptable for any season! If you are looking for a versatile nail art product that will be reached for time and time again, meet DGEL Cheek Spreading Water Gel! This clear art gel can be used to create watercolor-like designs, marble designs, and gradients. It can also be used to create a variety of nail looks, including popular blooming gel patterns. It’s a nail art product that can achieve high impact looks with minimal effort.
The gel is called “cheek” gel because it can be used to easily create the highly popular Korean blush nails (called “cheek nails” in Korean), that feature a radial gradient at the center of the nail resembling a blush on the cheek. However, Cheek Gel can be used to create a lot more! Cheek Gel helps your gel colors spread with ease–no special tools or advanced skills required. Its low viscosity allows colors to spread across the nail in just 5-10 seconds. This technique creates free-flowing shapes with an organic feel, making it easy to use for beginners and artists of any level. Users can also create a variety of limitless designs that include flower patterns, swirl patterns, abstract patterns, and other patterns. Read on as we share a few different ways on how to use DGEL Cheek Spreading Water Gel to create interesting blended color designs and patterns.
Prior to using blooming gel, prep the nails. Apply base coat and cure according to product instructions.
Gradient Designs
Radial Gradient
Apply base color and cure.
Apply one coat of Cheek Gel. Do not cure.
Apply a drop of syrup gel of choice at the center of the nail. Do not cure. Wait 5-10 seconds until desired spread is achieved.
Cure for 60 seconds.

Color Gradient
Apply base color and cure.
Apply one coat of Cheek Gel. Do not cure.
Apply syrup or color gel to the tip of the nail. Do not cure.
Use a brush to gently blend the color upwards creating a seamless blend.
Wait 2-5 seconds for the Cheek Gel to spread.
Cure for 60 seconds.

Multiple Gradient
Apply base color and cure.
Apply one coat of Cheek Gel. Do not cure.
One color at a time, apply your selection of syrup gel colors to the desired areas of the nail. Do not cure.


Use a brush to blend the colors together. Let the gel spread for 5-10 seconds until desired look is achieved. Cure for 60 seconds.

Marbly Designs
Apply base color and cure.
Apply Cheek Gel. Do not cure.
Apply desired syrup gel or color gel to various parts of the nail. Do not cure.
Use a brush to gently blend the colors and create the desired pattern.
Wait 2-5 seconds for the Cheek Gel to spread.
Cure for 60 seconds.

Pattern Designs
Swirl Patterns
Apply base color and cure.
Apply Cheek Gel. Do not cure.
Use a dotting tool to apply a dot of color in a swirl pattern on the nail. Do not cure.
Wait 2-5 seconds for the Cheek Gel to spread.
Cure for 60 seconds.

Crocodile Nails
Apply base color and cure.
Apply Cheek Gel. Do not cure.
For the center line, use a dotting tool to apply a generous dot of gel color at the base of the nail. Place the dot of gel color slightly off center and slightly drag the gel color to create an oval shape. Repeat this down the center of the nail. Place the dots of gel color with intention yet promptly. Do not cure.
Dot a line of gel color on one side of the nail. Do the same on the other side of the center line. Do not cure.
Wait 2-5 seconds for the Cheek gel to spread.
Cure for 60 seconds.

Tips When Using Cheek Gel
- Always apply a thin coat of Cheek Gel for the best results. Too much Cheek Gel can create an uneven surface when spreading.
- Use syrup gel when creating gradient designs for a more seamless blend.
- Use color gel when creating patterns for more color payoff.
- Use a dotting tool to dot color onto Cheek Gel for more rounded shapes.
- Use a dotting tool or liner brush apply gel onto the Cheek Gel while slightly dragging the color in a short stroke to create elongated shapes or create tapered ends.
- If the surface of the nail is slightly uneven after applying gel color onto the Cheek Gel, flip the nail upside down for a few seconds and back over, allowing the gel to settle and distribute more evenly on the nail surface
- If the surface of the nail is slightly uneven after curing the gel design on the Cheek Gel, use a medium viscosity top gel to create a thin overlay for a smooth and even nail surface
DGEL Cheek Spreading Water Gel is a versatile nail art product that can be used for a variety of nail art designs, making it a staple in any artist’s nail supply collection. Check out Cheek Gel and create your own beautiful designs with organic shapes and watery patterns to easily elevate any manicure.

For other nail content including nail art how-to’s, swatches, and new releases follow Sweetie Nail Supply on social media :


Leave a comment
All comments are moderated before being published.
This site is protected by hCaptcha and the hCaptcha Privacy Policy and Terms of Service apply.