
If you enjoy creating and wearing 3D nails, Jel and Gel glow-in-the-dark Ggumi Gels are a must-try for fun and cute 3D Halloween designs! These gels add an extra layer of excitement to your nails with vivid color and luminous glow in dim or dark settings. Glow-in-the-dark nails make a fun look for Halloween parties, late-night events, or a cozy night out trick-or-treating with the kids. Follow along as we show you how to create cute 3D Halloween nails using glow-in-the-dark Ggumi Gels that make designs come alive when the lights go out.

Before starting nail art, prep the nails and apply a base coat. Cure the base coat according to the manufacturer’s instructions using a UV/LED lamp. Apply two coats of DGEL Signature City Pop DS.186 as a glow-in-the-dark base color, curing fully between each coat.

When working with Ggumi gels, wear gloves to avoid gel sticking to your skin. Make sure that your work area and tools are free of dust and lint as best as possible to minimize unwanted debris from sticking to Ggumi gels as you work with them.
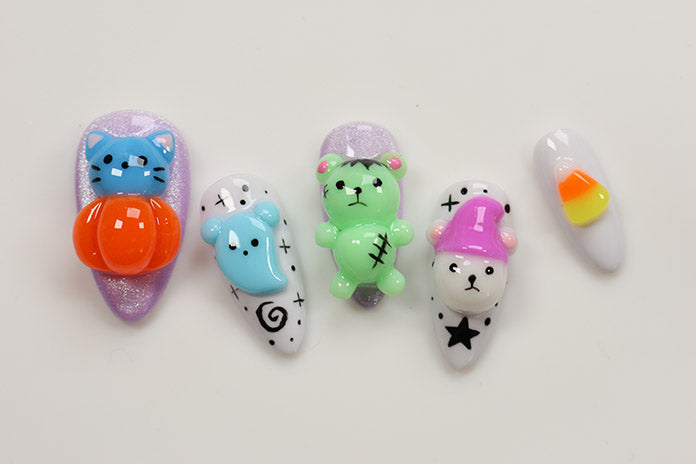
Cute 3D Halloween Nail
Blue Cat in a Pumpkin (Thumb)
Apply one layer of Jel and Gel Ice Star 2 MG-71. Use a nail magnet to bring the sparkle particles to the surface. Cure for 60 seconds. Remove the inhibition layer using an alcohol wipe.

Use a spatula to scoop out a pea-sized amount of Ggumi gel in the color EB-016. Roll it into a smooth ball, and place it on the upper half of the nail to form the cat’s head. Cure in a nail lamp for one to two minutes.

Next, roll out two small, even beads of EB-016 gel and place them on the top left and right corners of the cat’s head. Using a silicone tool, shape each bead into a triangular ear. Cure.

For the pumpkin, scoop out a bead of Ggumi gel in EB-018, slightly larger than the gel bead used for the cat’s head. Roll it into a ball and place it on the nail just below the cat’s head.

Use the flat surface of the spatula tool or silicone tool to slightly fatten the bottom of the bead. Use a flat silicone tool to lightly press indented lines into the gel, dividing the pumpkin into three even sections. Cure.

With Sweetie Nail Supply Liner #2 brush or a dotting tool and DGEL Painting Gel in Real Black, paint eyes, a nose, and whiskers on the cat’s face. Paint the inside space of the cat’s ears with a pink gel color. Cure.
Apply top gel. Cure.
Blue Ghost (Pointer)
Scoop out a small bead of Ggumi gel in EB-015 and place it at the center of the nail. Use a spatula tool to gently flatten out the bead. Next, shape the bead with a silicone tool into a ghost with a rounded head and a slightly curved and tapered tail. Cure.

Roll out two small beads of EB-015 and place each bead on the top left and right corners of the heads. Cure.

Paint dotted eyes and a nose on the ghost.

For more decorative details, add painted stars, swirls, and dots on the white space of the nail. Cure.
Apply top gel. Cure.
Frankenstein Bear (Middle)
Apply one layer of Jel and Gel Ice Star 2 MG-71. Use a nail magnet to bring the sparkle particles to the surface. Cure for 60 seconds. Remove the inhibition layer using an alcohol wipe.
Use a spatula to scoop out a pea sized amount of Ggumi gel in color EB-012. Roll the gel into a circular ball and place onto the upper half of the nail. This will be the head. Cure.
Scoop out a slightly larger bead of EB-012. Roll the gel into a circular ball and place it underneath the head. Cure.

Roll out six small beads that are relatively similar in size. Place two of these gel beads on top of the head for the ears. Place two beads on each side of the upper half of the body for the arms. Place two beads on each side of the lower half of the body for the legs. Use a silicone tool to refine the shape of the ears, arms, and legs. Cure.

Paint or dot the eyes and nose of the Frankenstein bear’s face with black painting gel.

Use a liner brush to paint hair and stitches on the Frankenstein bear. Paint the inner space of the ears with a pink color. Cure.
Apply top gel. Cure.
Magic Bear (Ring)
Scoop out a small bead of Ggumi gel in color EB-011. Roll the gel into a circular ball and place it on the center of the nail. This will be the head of the magic bear. Cure.

Roll out a smaller bead of Ggumi gel in color EB-020 and place it above the first bead. This will be the magic hat. Use a silicone tool to shape the bead into a soft cone shape, bringing some of the gel down over the head so it appears as if the bear is wearing the hat. Taper out the tail end of the hat, slightly curving the tail to the side. Cure.

Roll out two small beads of EB-011. Place one bead on each side of the hat for the ears. Cure.
Paint dotted eyes and a nose on the face. Paint stars and dots around the magic bear. Cure.

Apply top gel. Cure.
Candy Corn (Pinky)
To make the candy corn, take a very small bead of Ggumi gel in color EB-011 and place it on the top half of the nail. Place a slightly larger bead of Ggumi gel in color EB018 right below the first bead. Place a slightly larger bead of Ggumi gel in color EB-013 right below the second bead.

Use the spatula tool to shape the gels into a triangle shape. Once the desired look is achieved, cure.

Apply top gel. Cure.
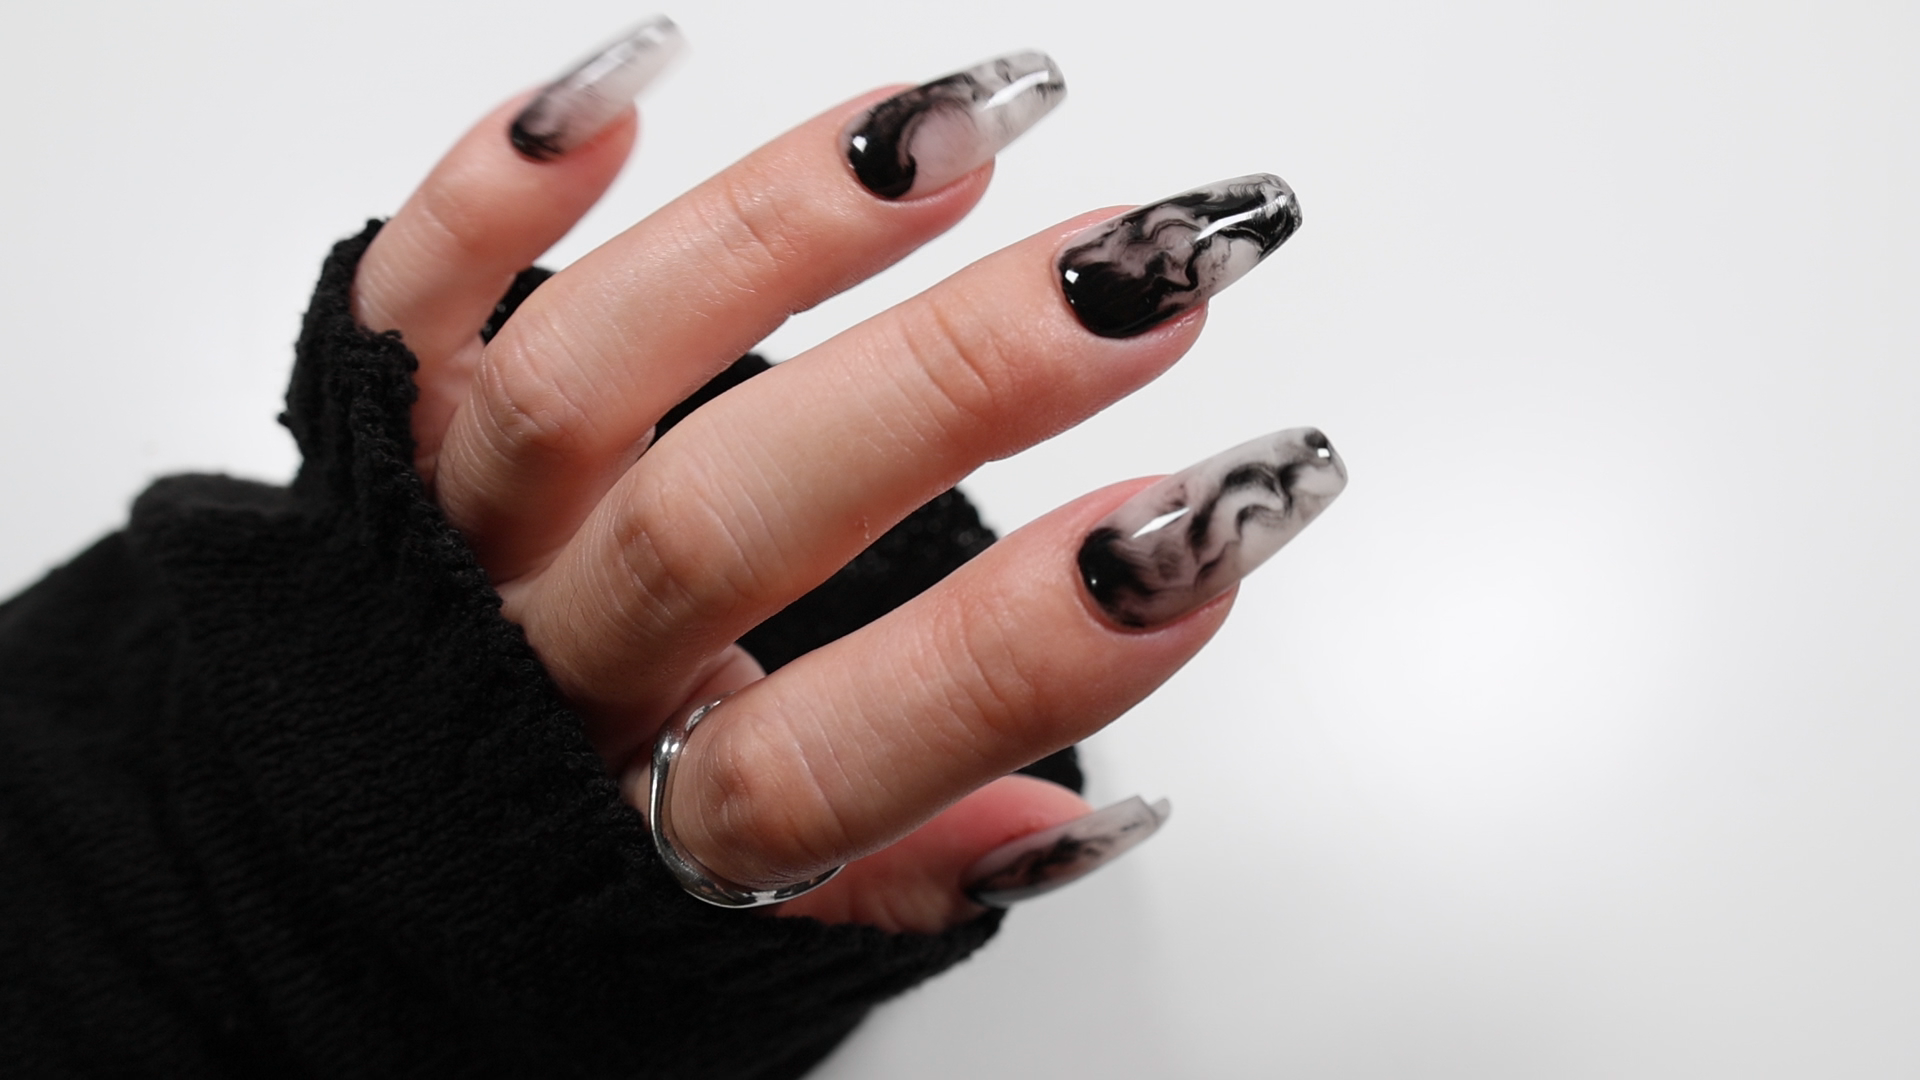
The completed set will look something like this:

Of course, the best part is when the nails glows in the dark:


Try creating your own 3D Halloween nail designs using Jel and Gel’s glow-in-the-dark Ggumi Gels. The possibilities are endless!
Check out other glow-in-the-dark nail products available at Sweetie Nail Supply for more fun luminous nail looks:
Powder
Gel Polish
DGEL Signature City Pop Collection
DGEL Signature Rabbit Hole Collection
DGEL Mini Bold Palette Collection
Glitter Gel
For more nail content including nail art how-to’s, swatches, and new releases, follow Sweetie Nail Supply on social media :
Leave a comment
All comments are moderated before being published.
This site is protected by hCaptcha and the hCaptcha Privacy Policy and Terms of Service apply.