
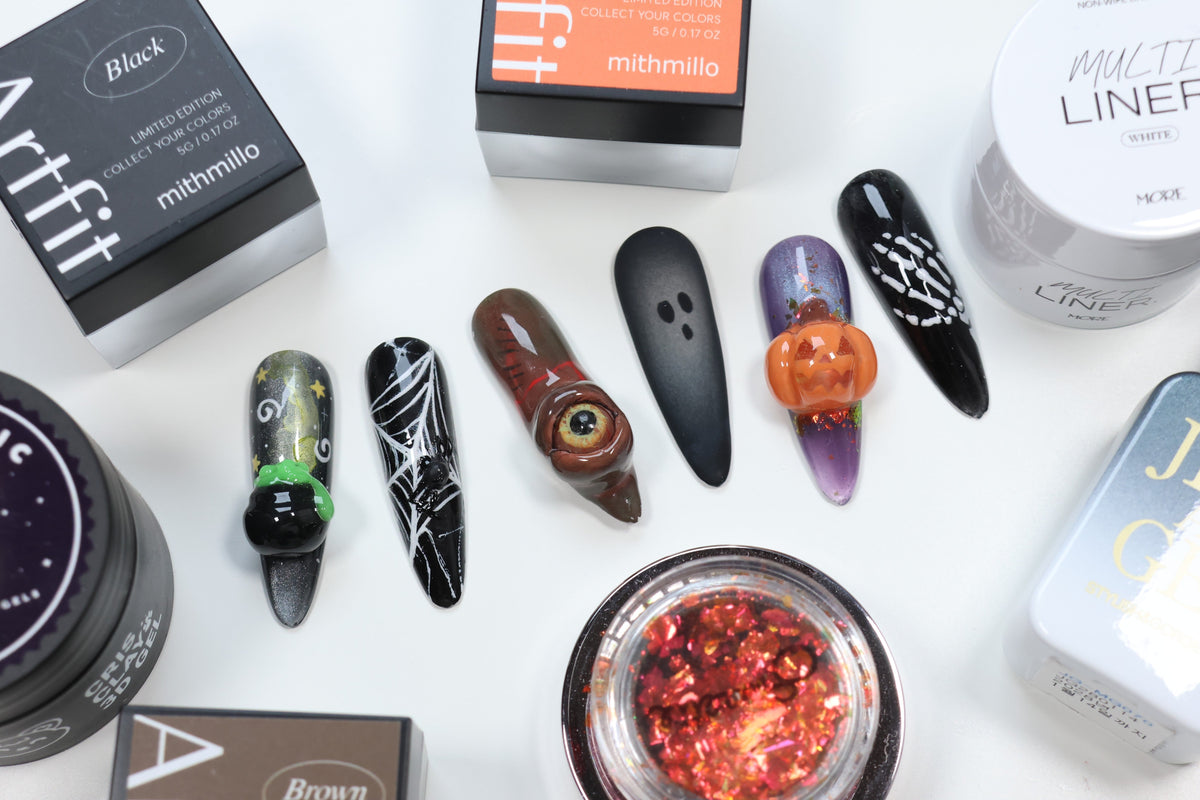

Spooky season is here! Planning for Halloween nails often starts with the search for inspiration and ideas. If you’re looking to try something different and maybe even a little challenging, check out these six spooky and fun Halloween nail looks that take Halloween to the next level. From moving three-dimensional parts to glow-in-the-dark fun, these Halloween nails are a trick AND treat. Learn what products you’ll need and how to step up your nail art for Halloween.
Skeleton Hand Nail

A skeleton hand adds a playful Halloween detail to an otherwise classic black nail. Begin with a black pat gel to create a black base and cure. Use a highly pigmented white liner gel, to paint lines and dots in the design of a skeleton hand on the nail. Start with the tips of the fingers working down toward the palm. Once the details are complete, cure the design for 60 seconds. Finish with a top gel to protect the artwork and add a smooth glossy finish. If you prefer to have a textured finish, use a non-wipe top coat after painting your base colour to protect the pat gel, and then draw the hand on top with a white non-wipe liner gel!
Glittery Spider’s Web Nail

If you’ve ever done spider web nails, this nail look is easy to achieve. Adding a few simple details such as glitter or 3D parts can elevate a simple nail design you may have done before.
To create this look, start off with a black base color. Use a pigmented white gel liner to paint a spider web on the nail. After curing for 60 seconds, line the web with a shimmery, silver cat eye or glitter gel. After top gel, use a non-wipe black embo gel to create a small 3D spider on top of the web. Use a black liner gel to paint the spider legs, fully cure for 60 seconds. Since the embo gel for the spider is non-wipe, don’t add a top coat, to maintain the details of the spider. The finished look is a spider web nail look with a shimmery web and spider that might even go unnoticed, but offer a subtle sense of amusement upon close observation.
Appearing/Disappearing Ghost Nail

This nail look is a Halloween take on the viral privacy screen nails trend.
For this look, start with a black base. Apply a black cat eye gel with silver magnetic particles and magnetize the particles to the center of the nail. In a circular motion around the nail, use the magnet to magnetize the particles to create a dancing orb effect at the center of the nail. Flash cure for 5 seconds. Use a black painting gel to draw two circles for ghost eyes and one circle for the mouth over the dancing orb. After a full cure (60 seconds), apply a matte top coat. The result is an effect that looks like a ghost is on the nail when viewing it straight on, but from the side view, the ghost disappears!

Creepy Moving Eye Nail

If you’re looking for a nail look that’s sure to attract eyes, this viral creepy moving eye nail look by nail artist @im_uliuli is a fun Halloween nail challenge to take on! Creating this nail look can get technical. We highly recommend creating this nail look on a long full-coverage nail tip as a press-on nail or temporary gel nail extension. It’s easier to work on a long nail tip and prevents potential damage to the natural nail.
To create the eyeball, completely wrap a small magnet (3-5mm in size) such as a magnetic ball in white 3d sculpting gel. Cure for 1-2 minutes. Rotate the ball in the nail lamp, curing two to three times to ensure all sides are cured. Use painting gels to paint the iris and pupil design of your liking. Cure for 60 seconds. Coat the eyeball with glossy top gel. Cure two to three times for 60 seconds, rotating the ball in the nail lamp to ensure all sides of the eyeball is cured.
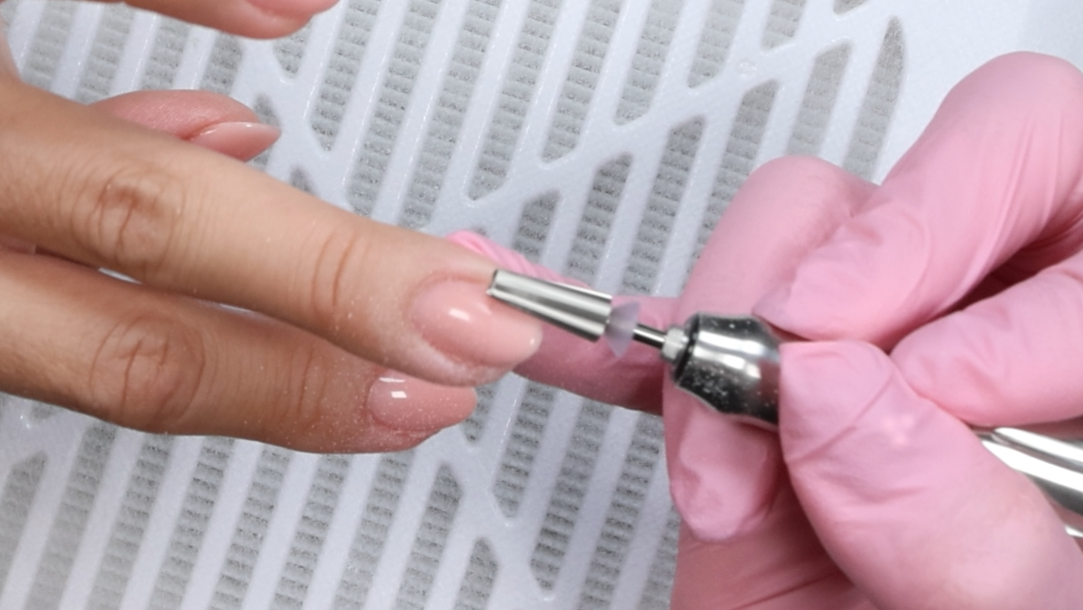
For the nail, use your choice of a solid pigmented gel or pat gel to coat the nail with color. Use an e-file bit with a pointed tip such as a flame bit to create a hole in the free edge part of the nail tip. Establishing a firm hold on the nail tip and using the e-file bit at a higher RPM (20,000-28,000) will be smoother when penetrating the nail to make a hole. Once the pointed e-file bit has penetrated the nail tip, you can use a larger cone bit to quickly enlarge the hole for the eyeball to sit in. Once the appropriate hole size has been achieved, smooth out the rough edges with a diamond ball bit or sanding band.
Take a bead of white 3d sculpting gel and flatten it to cover the hole. Use a brush wet with alcohol or a silicone tool to push the flatten 3d gel into the hole to create a concaved groove for the eyeball to sit in. Check to make sure the eyeball fits in this groove and can rotate within the groove, but do not leave the eyeball in there while curing. Blend out the edges of the 3d gel onto the surface of the nail. Cure for 60 seconds. Once cured, set the eyeball back into place.
Use 3d gel to create the upper and lower eyelid over the eyeball in the groove. Create the upper eyelid first, checking to make sure the eyeball can still rotate freely. Cure for 1-2 minutes.
Next, the first layer bottom fold over the eyeball in the crevice. Again, check to make sure the eyeball can rotate freely. Cure for 1-2 minutes.
Now that the movement barriers are created, you can build upon the upper and bottom eyelids to refine the look. Cure for 1-2 minutes.
Apply your choice of color and details for the nail and eyelids surrounding the eye. Add texture using texture gel or 3d gel and hand painted details to achieve the level of spook desired.
Finally, carefully apply top coat and keep it thin around the eyeball area to prevent it from seeping into the crevices between the eyelids and eyeball. Cure for 60 seconds. Use a magnet to move the creepy eyes for a frightful look.

Fiery Jack-o-Lantern Nail

For a nail look with a jack-o’-lantern that appears to be glowing, apply a purple cat eye gel color on the nail. Use a magnet to magnetize the particles to the upper center of the nail. Cure for 60 seconds. Next, apply orange glitter flakes on the center of the nail. Add a coat of clear gel and cure for 60 seconds..
Next, take a bead of clear 3d sculpting gel and create a rounded pumpkin shape on the nail over the orange glitter flakes. Use a flat edge silicone tool to create indentations on the rounded 3d sculpting gel to create the texture and shape of a pumpkin. Cure for 1-2 minutes.
Paint the pumpkin shape with a pigmented orange painting gel, leaving the eyes, nose, and mouth of the jack-o’-lantern transparent.
Add a stem made using 3D sculpting gel. Paint the stem with a brown painting gel. Finally, apply top gel.

Rotate the nail in different directions to see what appears to be an orange flicker glowing from within the pumpkin’s eyes, nose, and mouth.
Glow-in-the Dark Witch’s Brew Nail

This nail look features a cauldron of mysterious, magical witch’s brew that glows in the dark.
To create this look, apply a black cat eye gel color to the nail. Use a magnet to magnetize the magnet particles, creating a centralized vertical design on the nail. Cure for 60 seconds.
Use a bead of black 3d sculpting gel to create a cauldron on the nail. Cure for 1-2 minutes.
Use green glow-in-the dark 3d sculpting gel to create a brew that appears to be bubbling and overflowing on the surface of the cauldron. You can achieve this by working with multiple small, round beads of sculpting gel and adding them on top of the cauldron. Cure for 1-2 minutes.
Use metallic green ink to create a smoky effect from the witch’s brew. Allow 30-60 seconds for the ink to dry. Use pigmented painting gel to paint stars and magical details above the witch’s brew. Cure for 60 seconds.
Finally, apply top coat. For a more vibrant glow-in-the dark effect, “charge” the witch’s brew glow by shining a UV/LED flash cure light on the nail for full effect in the dark.

We hope you enjoyed these Halloween nail ideas and get inspired to create your own spooky, fun nails. There’s always room to get creative with your nails, especially this time of year. Whether you’re going for something cute, creepy, playful, or a little mysterious, celebrate spooky season and Halloween with fun interactive nails. Happy Spooktober!
For more nail content including nail art how-to’s, swatches, and new releases, follow Sweetie Nail Supply on social media:


Leave a comment
All comments are moderated before being published.
This site is protected by hCaptcha and the hCaptcha Privacy Policy and Terms of Service apply.