Shimmering rhinestones can make some of the most stunning embellishments in nail design. The glamorous and eye-catching appeal of rhinestone nails make a befittingly decorative nail art choice for the festive winter holidays. When arranged thoughtfully, rhinestones can add a touch of sophistication–even for those who prefer a more minimalist style. At Sweetie Nail Supply, we offer a sparkling selection of stone embellishments for rhinestone nail design. Read on and follow our tips and tricks for all things rhinestone nails. Get ready to dazzle! Discover how to arrange, apply, and remove rhinestones for exquisite nail designs.
Rhinestone Placement
Thoughtful placement of rhinestones on the nail is important not only to achieve the desired effect, but also to ensure its secure attachment to the nail. The style, the nail length, and nail shape are factors to consider when arranging rhinestones.
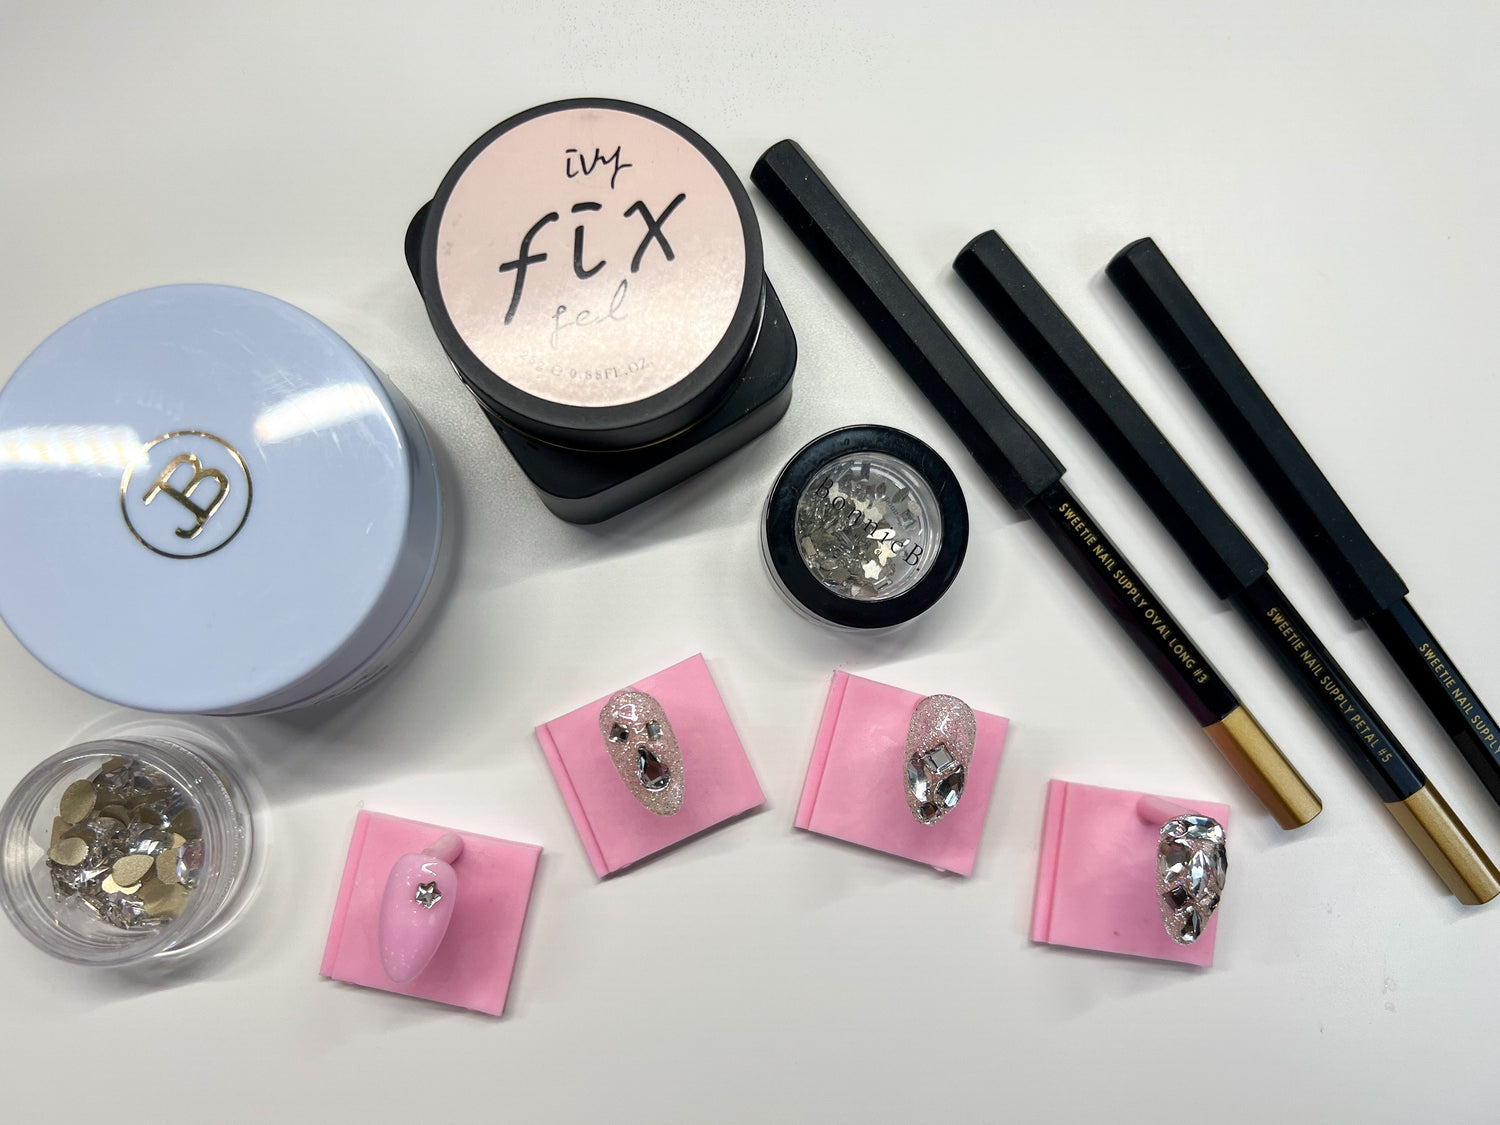
For more minimalistic styles, a small single rhinestone centered on the nail can create a polished and subtle accent. Placing one or two rhinestones off-centered on a few or all nails can create a minimal, yet more trendy effect. This option is versatile and can be done on any nail shape and length.
Partial rhinestone nails can add a fancy touch that is balanced between minimal and flashy. Depending on the rhinestone sizes, place two to five rhinestones on the lower half or tip of the nail. This style typically works best on nails with a bit of length and can be adapted for any shape. Select rhinestone shapes that fit securely on the nail without extending beyond the nail edge.
If you want to go all in, choose full rhinestone nails for a luxurious and eye-catching effect. When arranging a full rhinestone nail look, consider the rhinestone shape and place them in a way that fits together like a puzzle to fill up space on the nail, while leaving a gap between the rhinestones for gel application and easy removal. This look can be adapted for any length or shape. For shorter nails, select smaller rhinestones and arrange them to cover the full nail.
Whether you are designing a more minimalistic look or something a little more ritzy, placing rhinestones closer to the center of the nail rather than the sides ensures maximum visibility and security. Remember to leave some space between rhinestones during placement to allow for better reinforcement during application and easier removal.

Rhinestone Application
When attaching rhinestones to the nail, securing and reinforcing adhesion are important to minimize the fallout of rhinestones. Gel specifically formulated to adhere nail parts or thick viscosity gels work best for applying rhinestones to the nails. JIN.B IVY Cool Clear Builder Gel Hold Type is a thick gel that works great for keeping rhinestones and nail parts in place as you arrange and place rhinestones on the nail. The thick gel viscosity also keeps a durable hold to secure rhinestones once cured.

This next step to securing rhinestones on the nail will change your rhinestone application game. Apply a thick non-wipe gel around the rhinestones to reinforce its hold using JIN.B Ivy Fix Gel and a thin liner brush. Avoid applying gel over the rhinestones. Applying gel over the rhinestones will cover the rhinestone facets and reduce the stone’s reflection of light, dulling the overall shine.

Rhinestone Removal
Removing rhinestone nails requires more than acetone alone. For rhinestone removal, you will need to file the gel surrounding the rhinestones using a parts removal nail bit. Use a tapered or pointed bit designed for nail parts removal such as the Nailbayo Tapered Carbide Bit or YOGO Mango Parts Removal Bit to loosen the rhinestones on the nail.

After removing the gel around the rhinestones, gently loosen and remove the rhinestone using a rhinestone removal clipper or a large nipper designated for removing rhinestones and other nail parts. Once the rhinestones have been removed, proceed with gel removal.
Caring for Rhinestone Nails
While diligent rhinestone application and reinforcing the hold is critical to making sure rhinestone nails last, caring for a rhinestone manicure is also crucial to help rhinestones stay on until removal. Whether you create rhinestone nails for yourself or someone else, it is important to wear protective gloves when doing any heavy handwork or working with household chemicals.
Protecting your nails using gloves minimizes wear and tear since repeated impact and exposure to household chemicals can dull the shine of the rhinestones as well as wear out or break down the gel securing the rhinestones. Wearing protective gloves also helps minimize the possibility of knocking the rhinestones out of place.
Also, avoid extended exposure to heat such as long bath soaks, hot tubs, or saunas. Extended exposure to heat can affect the gel which may loosen the hold on the rhinestones. If possible, minimize your time in such settings or try keeping your hands out of the water for most of the time during baths and time in a hot tub.
Rhinestone nails are akin to jewels. They can elevate and bedazzle your overall style with a touch of glamour. Beyond their aesthetic appeal, the lasting hold of well-applied rhinestones ensures they stay in place and knowing how to remove rhinestones efficiently and safely are important to avoid damage to the nails. With proper application, removal, and care, rhinestone nails can be a stunning and long-lasting enhancement to express your beauty and style.


Leave a comment
All comments are moderated before being published.
This site is protected by hCaptcha and the hCaptcha Privacy Policy and Terms of Service apply.