
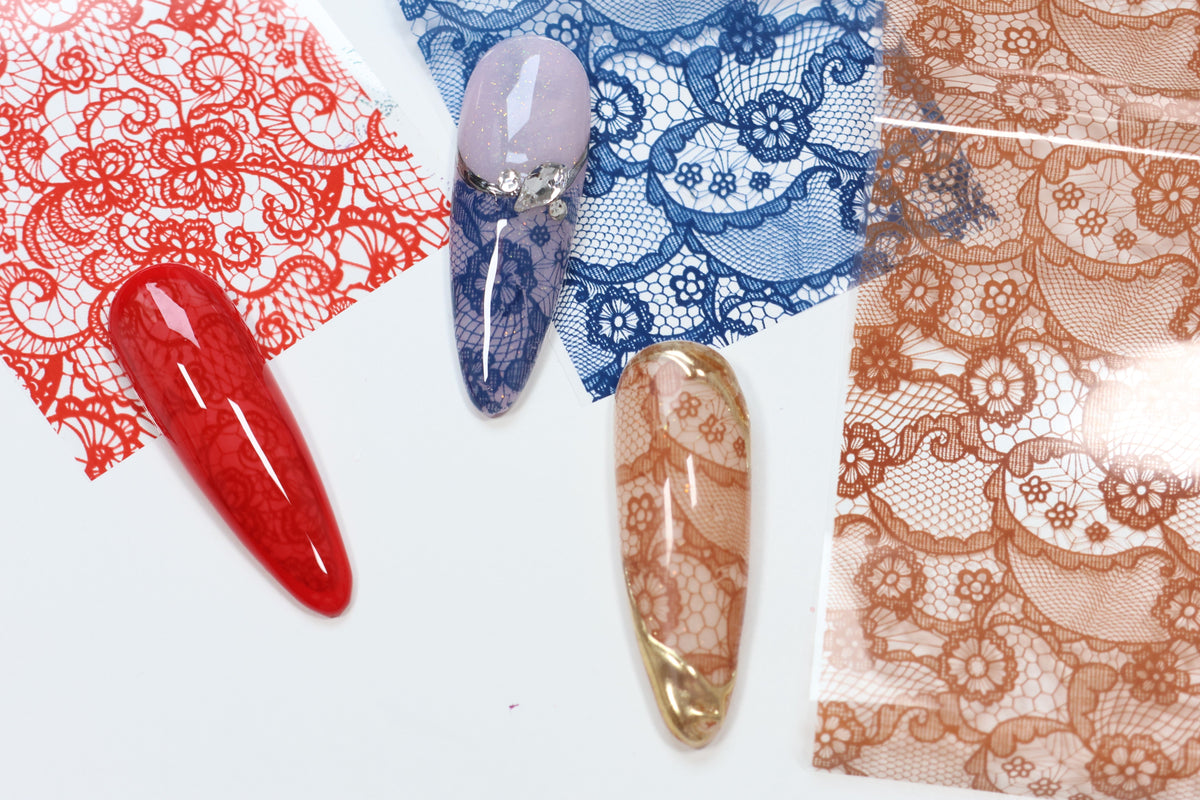

Lace is a detail that can transform a nail design, adding a touch of delicate romance and feminine elegance to sensuality, mystery, or an unexpected edge. Its intricate patterns and versatility make it a beautiful choice for nail art that transcends seasons and occasions. In this post, we’ll explore three ways to achieve lace designs on nails.
Foil

Using lace pattern nail foil is one of the easiest ways to achieve lace nail designs. This method saves time and results in ornate details that resemble delicate lace fabric. Tominail Lace Foils come in select colors including classic white and black to express your desired mood.
The supplies you need to apply nail foils are your desired foil design and a specialized gel such as Tominail Sticky Gel that allows the foil to adhere to the nail surface.
How to apply lace foils:
To prepare your foil for use, cut foil to length and width to fit the nail leaving some extra room to ensure the foil covers the entire nail surface.
Step 1: After prepping the nail, apply base coat and gel color following manufacturer’s instructions.

Step 2: Apply one coat of Tominail Sticky Gel. Cure for 30 seconds.

Step 3: Carefully press the foil onto the nail. The foil is applied with the design facing up and the backside in contact with the nail. Use your finger or a silicone tool to smooth out the foil over the nail surface, minimizing folds or creases. If folds or creases do occur, gently remove the film and smooth the film flat. Lay the part of the design that did not get pressed onto the nail over the empty space, aligning the design patterns. Then press down on the foil to apply.

Step 4: (Optional) Apply a clear gel to seal the foil design. Cure according to manufacturer’s instructions.
Step 5. Apply top gel. Cure according to manufacturer's instructions.

Stamping

Stamping is another method that can be used to apply lace designs to the nails.
To use the stamping method, you’ll need a stamping plate with lace designs and stamping gel, a pigmented gel formulated for use with the stamping method. It is ideal to use stamping gel as other types of gel may not be as effective or result in a clean and clear transfer. Mithmillo offers a few series of stamping gel in themed colors to achieve your stamping designs.
Stamping lace designs offer a few benefits compared to other methods. Using a stamping gel that is non-wipe can be paired with chrome powder application for a metallic or iridescent finish. When done correctly, stamping designs can contour the nail surface for a more seamless appearance than using nail foils. Using a stamping plate with standard patterns allows you to use it repeatedly and achieve more consistent lace patterns for multiple nails or nail sets. Stamping plate lace patterns also offer more intricate patterns with finer lines and details in comparison to handpainting.
How to use stamping plates and gel:
Step 1: After prepping the nail, apply base coat and gel color following manufacturer’s instructions.

Step 2: Remove the inhibition layer with an alcohol cleanse as a matte surface typically works best.
Step 3: Apply a thin layer of stamping gel onto your desired design on the stamping plate. Only a small amount enough to cover the entire design is necessary.

Step 3: Use a scraper at a 45 degree angle to scrape off excess gel from the stamping plate surface in one quick swipe. Two swipes may be needed to spread the gel across the stamping pattern and remove excess gel. However, it is important not to swipe more than necessary or there may not be enough gel for the pattern to transfer onto the stamp.

Step 4: Using a firm and controlled rolling motion, slowly press the stamp onto the stamping pattern and slowly lift the stamp to pick up the pattern. Gel stamping differs slightly from lacquer polish nail stamping and requires a slower rolling motion to pick up the pattern.

Step 5: Using a slow rolling motion, firmly press the stamp onto the nail, applying one side of the stamp first, then slowly lifting the stamp as the rest of the pattern is applied. It’s important to use slow motions as stamping too quickly can result in a smudged or blurry transfer

If necessary, use a brush dampened with acetone to remove any unwanted stamp patterns on the nail.

Cure for 60 seconds.
Step 6: Apply top gel. Cure according to manufacturer's instructions.

Handpainting

For those who prefer a custom pattern, lace details can also be handpainted. Although handpainting lace patterns requires more technicality, time, and patience, this method can be done using tools you may already have and result in a more unique design.
For handpainting lace designs, you’ll likely need a fine liner brush and pigmented painting gel.
How to handpaint lace designs:
Step 1: After prepping the nail, apply base coat and gel color following manufacturer’s instructions.
Step 2: Paint your desired lace pattern onto the nail. Flash cure as needed throughout the process then cure for 60 seconds after the final look is completed.


Step 3: Apply top gel. Cure according to manufacturer's instructions.

If you’re considering different art techniques or looking for a way to add more visual interest to your next nail set, try lace patterns for an ornate look. The best method for achieving lace designs depends on your desired result. Experiment with different application methods, colors, and patterns to discover how lace can transform your designs.
For more nail content including nail art how-to’s, swatches, and new releases, follow Sweetie Nail Supply on social media:


Leave a comment
All comments are moderated before being published.
This site is protected by hCaptcha and the hCaptcha Privacy Policy and Terms of Service apply.