
If you are looking for an easy way to add natural and lightweight yet durable nail extensions, you need to try JIN.B Ivy Poly Gels, a hybrid formula combining the flexibility of gel with the strength of acrylic, making it a great option for building nail extensions, since artificial length requires a durable product. Unlike acrylic, Ivy Poly Gel will not harden until it is cured in a UV/LED nail lamp. If you are a beginner or creating nail extensions on yourself, this gel is convenient to use because it allows you to take your time to apply and shape the nail enhancement to your liking before hardening it by curing the Poly Gel in a nail lamp. With a thicker and sticky consistency in comparison to builder gel, Poly Gel will not run, allowing you ample time to form your nail enhancement. This gel also stays put where it is placed and requires a bit of slip solution, gel cleanser, or alcohol on a stiff brush to move and maneuver it to your liking, allowing you more control in building nail extensions. JIN.B Ivy Poly Gels are easy and convenient to use in crafting strong and long lasting nail extensions.
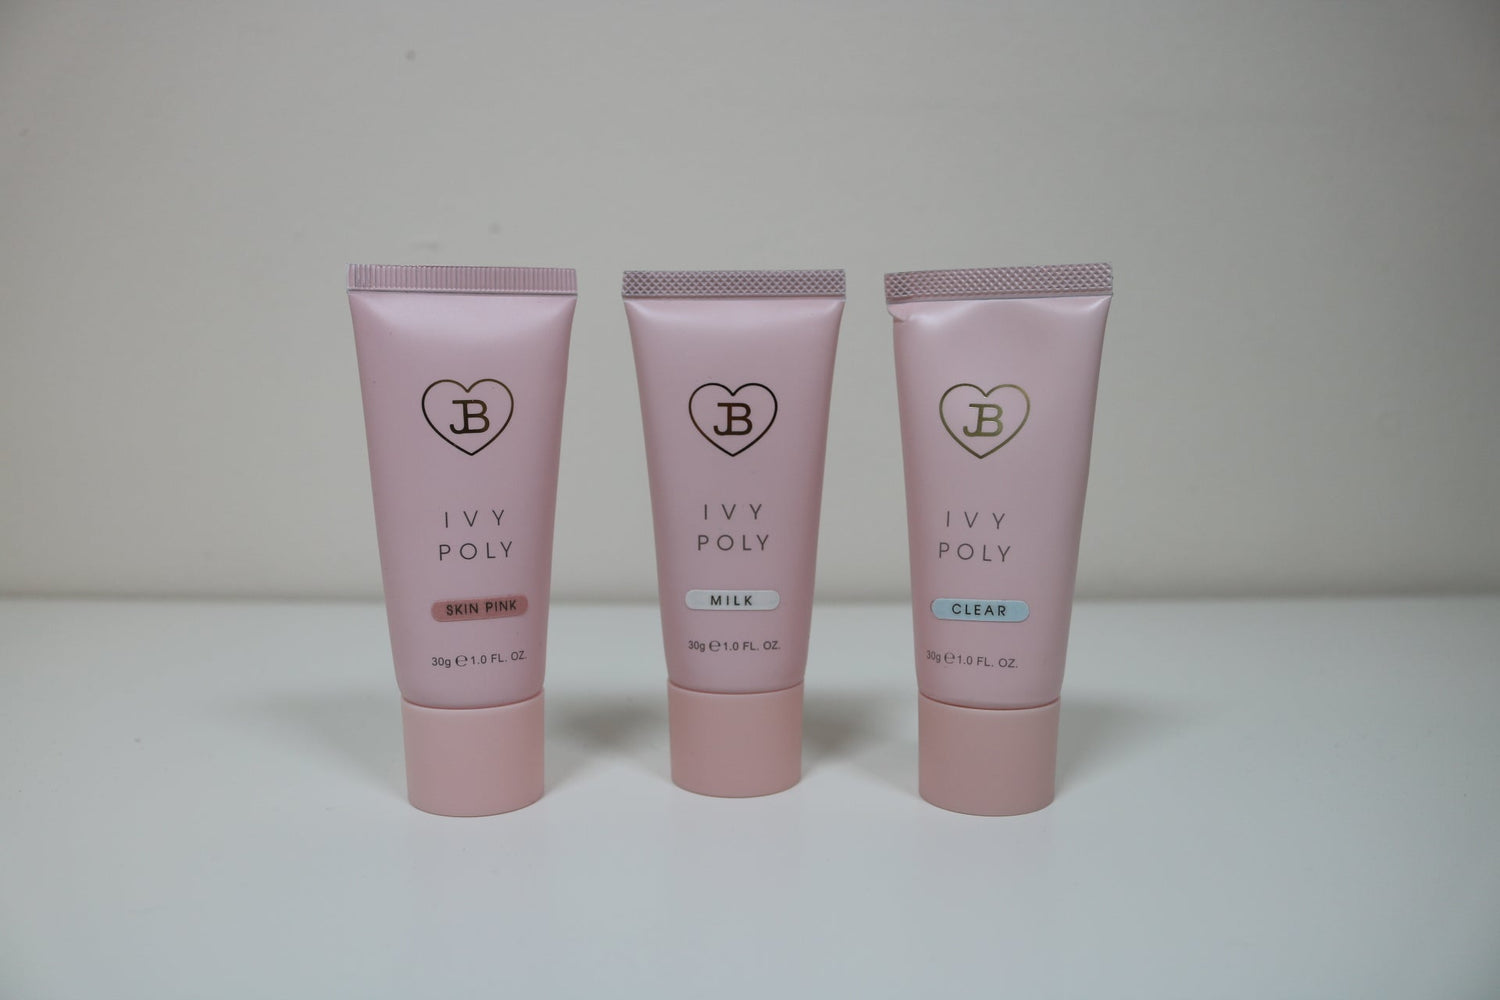
Available in clear, skin pink, and milk, the JIN.B Ivy Poly Gels can be used to create various looks including gradient nail extensions. To create nail extensions, you will need either plastic dual nail forms or paper nail forms as a supporting surface to build the nail extension. Dual nail forms help in creating an apex and a smooth and even surface, while paper nail forms allow for being able to custom tailor the nail extensions to fit comfortably with the natural nails. Paper nail forms are a great option for wider or narrow nail plates that might not align with dual forms in width size.
Things You Will Need:
JIN.B IVY Poly Gel
Gracia G-Gelly Base Gel
Gel application brush
Gel spatula
Slip solution, Gel Cleanser, or Alcohol
Dual forms
Lint free wipes
Paper forms
Medium grit file
Buffer
Top gel
Using Dual Forms
- Prep the nails and apply base gel.

- Size the dual form tips to your natural nails, making sure the forms fit from sidewall to sidewall of the nail. Lay the dual forms out in front of you.
- Squeeze a small dollop of Poly Gel onto the base of the dual form.

- Dip the gel brush into the slip solution. Remove any excess solution by running the brush up the side or across the rim of the dapping dish.

- Use the brush to spread out the Poly Gel on the dual form to create the desired length and shape of the nail extension. If the brush starts to stick to the Poly Gel, clean the brush in the slip solution.

- With the Poly Gel on the dual form, hold the dual form at the base of the nail at a 45 degree angle, pressing the form downward onto the nail plate using very light pressure. The Poly Gel at the base of the dual form should be flush against the nail without gel spillage or overflowing. The Poly Gel at the tip of the nail should be slightly thicker as the form is pressed onto the nail. Once the dual form is positioned as desired, cure the nail in a nail lamp for 60 seconds.

- After curing, remove the dual form. Repeat steps 3-6 on other nails.


- Once all nail extensions are applied on one hand, do a full cure for 60 seconds.
- Repeat Poly Gel application steps 3-8 on the other hand.
- Once nail extensions are applied, cleanse the nails with a lint free wipe and alcohol.
- Use a file to refine the shape of the extensions. Use the buffer to refine the surface of the nails.
- Cleanse the nails with a lint free wipe and alcohol.
- Apply optional gel polish, if desired.
- Apply top gel and cure.
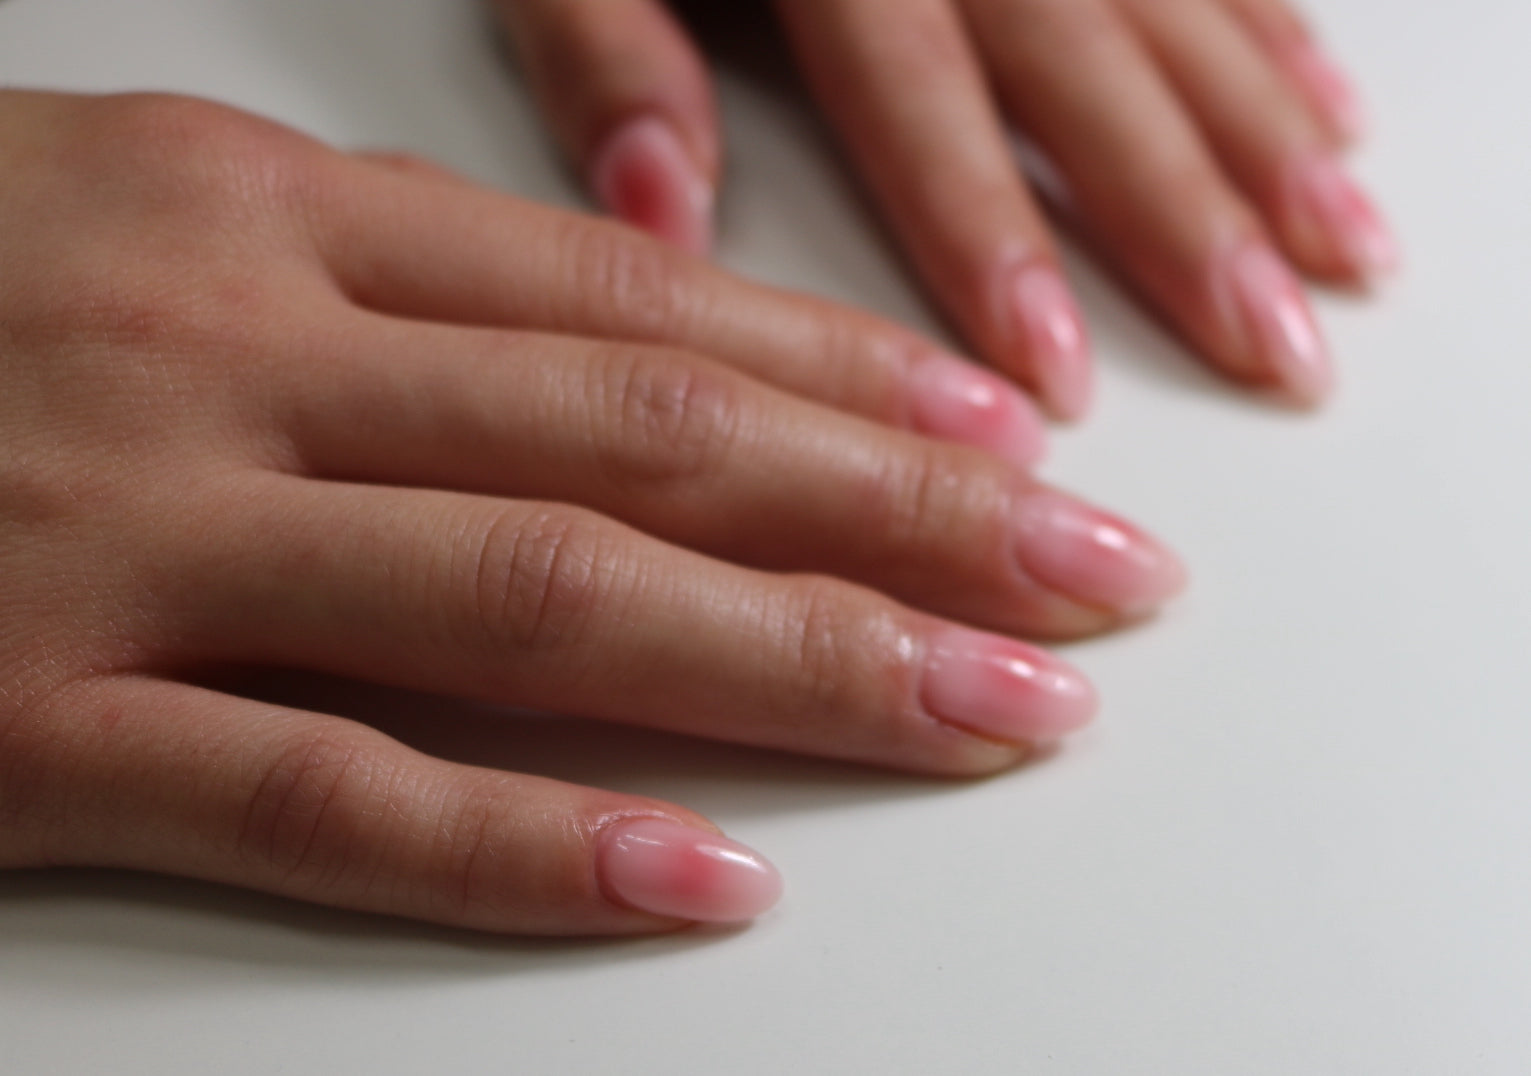
Pink & White Gradient Nail Extension Using Paper Forms
- Prep the nails and apply base gel.
- Apply paper form on the finger.

- Squeeze a dollop of milk Poly Gel onto the gel spatula and apply the dollop of gel to the tip of the natural nail where the nail meets the paper form.

- Dip the gel brush into the slip solution. Remove any excess solution by running the brush up the side or across the rim of the dapping dish.
- Use the brush to spread out the milk Poly Gel on the form, building the free edge or white tip of the nail extension in desired length and shape. Use the brush to bring down a thin layer of milk Poly Gel over the natural nail. The mid-section of the nail extension should be slightly thicker than the free-edge of the nail extension.

- Cure for 60 seconds.
- Squeeze a small dollop of skin pink onto the base of the nail.

- Use the gel brush to carefully push the skin pink Poly Gel towards the cuticle area, thinning it out at the base.
- Spread the skin pink polygel across the nail, blending a thin layer over the milk polygel at the apex of the nail. Once the desired arch shape and gradient effect has been achieved, cure for 60 seconds.


- Repeat steps 2-9 for each nail.
- Once all nail extensions have been applied on one hand, cure in a lamp for 60 seconds.
- Repeat Poly Gel application steps 2-11 on the other hand.
- Once nail extensions are applied, cleanse the nails with a lint free wipe and alcohol.
- Use a file to refine the shape of the extensions. Use the buffer to refine the surface of the nails.

- Cleanse the nails with a lint free wipe and alcohol.
- Apply optional gel polish, if desired.
- Apply top gel and cure.

JIN.B Ivy Poly Gels make applying long lasting, durable, and beautiful nail extensions on yourself or others an easy process. There is no fighting against time to get the desired shape before hardening nor fighting against flowing gel. With JIN.B Ivy Poly Gel, you are in complete control with crafting nail extensions and the application process is a bit more forgiving with less pressure in comparison to other nail extension techniques such as builder gel extensions or application of full coverage soft gel tips. Try creating your own nail look with JIN.B Ivy Poly Gels and let us know what you think!
Leave a comment
All comments are moderated before being published.
This site is protected by hCaptcha and the hCaptcha Privacy Policy and Terms of Service apply.